|
Circles are the easiest and the most
difficult shape to ride correctly.
Equitation patterns usually include circles
or part of a circle in conjunction with other exercises. So it’s a smart
choice that when practicing to become an effective equitation rider that a good amount of your practice time be spent learning
to ride a circle correctly.
When a horse moves in a circle he bends
his body to match the curvature of the shape. It is important when asking for
a circle that the rider pictures the figure on the ground and to follow it. The
horse must not drift to the outside and make the circle too wide or drift inward and make the circle too small.
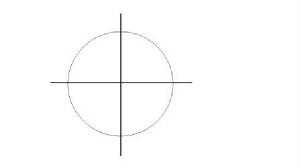
A circle is perfectly round, not oval,
egg shaped or D shaped. This is easier said than done.
A rider needs to have a good balanced
independent seat to be able to correctly use all of the aids while riding a horse. Starting
to learn how to ride a circle correctly and effectively riders may struggle to learn how to use the correct aids. As a rider progresses with their training the difference between the basic application of aids, true coordination
of the aids as the rider’s ability to feel the effects of her aids, to access those effects and their effectiveness
and to make adjustments in the amount of pressure and the timing of the aids to get a better result next time will take a
while. While working toward the goal of riding a perfect circle riders will make
an endless number of substandard circles and that’s ok as long as the rider learns from each mistake, does the best
she can, continues to have a positive attitude and just keeps riding.
The aids for a circle are always the
same just there application becomes more subtle as the rider’s and horse’s understanding increase. The rider places more weight on the inside seat bone. The
inside rein positions the horse’s head slightly to the inside shoulder and gives the horse direction and the amount
of bend for the size of circle. The outside rein keeps elastic contact to hold
the horse straight on course and sustains the balance, free forward movement and keeps the horse from drifting inward. The inside leg pushes against the horse and is the “driving” leg and keeps
the shoulder up and out of the way and the outside leg lies against the horse and acts as a “keeping” leg that
acts like a wall which keeps the horse from drifting outward. To move straight
on a curved line the horse’s inside back foot travels along the same line as the inside front foot and the outside back
foot travels along the same line as the outside front foot.
Ideally a circle has between 16 to 24
strides total staying with an even number that is divisible by 4 and the number of strides depends on the size of the horse
and the arena. Instead of concentrating on the entire circle as a whole in your
head visualize dividing the imaginary circle that’s on the ground into 4 equal parts as if you made a cross through
the circle and the cross touched 4 arcs. From your starting point look to the
2nd point which is ¼ of the circle. Once you get about 2 strides before
the 2nd point look ahead to the 3rd point and then the same for the 4th point and continuing
to your starting point. So what you are doing is concentrating on one quarter
of the circle at a time and looking ahead the whole time which helps keep the rider from veering off course.
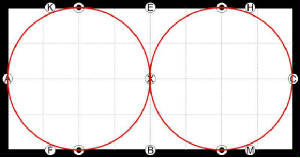
To be able to execute a figure eight
a rider will need to learn where she is in the ring at all times. A technique
that might be useful to help learn to feel where you as the rider are in the ring is to mentally draw a line down the center
of the ring where your change of direction and meeting of the two circles of your figure will be and then crosswise where
the diagonal/lead change and change of direction will be made. Find a visual
marker for each line and use those to ride to your mapped points.
When it’s time to execute the figure
use your markers that you have mapped earlier. Remember not to look down for
your diagonal change and remember to look up once the correct lead has been picked up so you avoid your horse going forward
on auto pilot which will more than likely carry you on an inaccurate figure.
Practice at home walking, trotting and
cantering figures concentrating on riding your markers by looking up and ahead. Remember
what you learned from riding circles about counting your strides for even shapes and using your aids while still paying attention
to your location in the ring as you progress through the figure so your changes in direction and changes in diagonal or lead
are in the correct spot.
The rule book states “figure eight
at the trot, demonstrating change of diagonals.” Diagonals are very important
in trotting figure eights but many riders become so distracted by the diagonal change that they feel they are the main point
of the figure eight. It is good to know that no matter how perfect the figure
eight if the diagonals are incorrect the pattern is no good. It’s best
to remember that the diagonal is the simplest part of the figure eight. This
is a test that gives the rider the opportunity to display perfect control of horse and proficient use of aids. If the rider is not proficient with diagonals it best to avoid performing inverted (facing center) figures
if possible till the rider can pick up the diagonal with no problem. It takes
a great rider to make to identical circles (this includes size, shape, speed and center point) with horse and rider working
as a team. Some riders have a hard time executing a decent figure which might
be seen as poor riding skills when it’s actually a failure to explain what a figure eight is at all.
It is common
for a rider to trot a straight line for the first circle and then cut the top of the second circle to early and the matching
the top halves of the two circles are difficult. Remember what was learned from
riding the circles for even top halves. While there are no straight lines in
a circle but in a figure eight there will be one step of straightness at the center point.
At this point the rider should be able
to pick up the correct leads on and off the rail. It is important to have a proficient
understanding and use of the aids for cantering a figure eight. Trotting a figure
eight needs to have excellent rein work but cantering needs superior understanding of the leg aids since they play a more
crucial role in the canter figure eight.
Being able to pick up canter leads off
the rail while sitting centered in the saddle is important. For example if the
rider leans over the horse’s shoulder to pick up a lead a rider might have a tendency to pull the horse in the opposite
direction and since most horses move where they are pointed it is possible that the incorrect lead will be picked up. The hand aids are used to keep the horse’s front end on track while the leg
aids ask the horse to move forward and when used independently move the backend away from legs in order to pick up the correct
lead and to guide his body along the figure as discussed before with riding circles.
If the rider’s weight is leaning forward towards the inside shoulder the horse might have a tendency to move
too fast and will also ask the horse to make a smaller circle. This might cause
a highly noticeable uneven figure. Remember to use the correct aids to guide
and to keep the horse collected, in the correct lead and so that the horse returns to the exact center point.
The change in the cantering figure eight
is identified as a simple change of lead. “This is a change whereby the
horse is brought into a walk/halt and restarted into a canter on the opposite lead.”(Crabtree) When the horse is stopped in the canter the rider needs to realign his feet, legs, hips and weight so the
change to the other lead can be performed. If the rider stops the horse abruptly
and tries to rush to pick up the other lead this will most likely cause problems. Think
ahead and give the horse a chance to set up to pick up the other canter lead and use your aids accordingly.
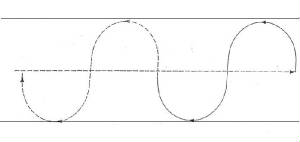
A serpentine is a series of half circles
connected by straight lines. Each half circle or loop should be equal in length
and width. To ride well shaped serpentines use the technique that was discussed
before but use the rail as one line and then use one imaginary line as your other rail so you have a guide of how deep you
can ride into the center of the ring (usually lined up with one side of the judge’s stand) and the other as your center
line where the change of direction along with the change of diagonal/lead is performed.
It might also be smart to make an imaginary line at your center point length wise so you can space out your loops evenly
down the rail. Making winding lines that just go up and down the ring is undesirable. When riding the half circles the end of the bend of the circle where the change of
direction is made should be perpendicular to the rail of the ring and should be one straight stride then move on to the other
loop. It does not mean there should be a couple strides of straightness. A serpentine is a series of half circles so to make the same size half circles use
the same technique used to make the same size full circles but cut in half. A
good half circle should be 8 to 12 strides (half of a circle’s) and cut the loop into two arcs and look ahead and so
on. Often riders cross the center line on a slanted and then make a sudden turn
to cut back and slant again across the imaginary line. It is obvious that these
are not well shaped serpentines and it really isn’t logical to change diagonals since there was no real change in direction
at the center point. Such mistakes make it obvious the rider does not have a
true understanding of the serpentine. Many mistakes can be prevented by thinking
ahead and analyzing the ring beforehand. Very large loops show lack of control and ingenuity and small waving lines are equivalently
unimpressive. Equitation tests are called patterns for a reason so make sure
you are making a consistently good pattern. What is also important is that the
horse and rider are working as a team and a rider that thinks ahead and knows their horse so they can ride them through the
pattern to the best of the horse’s ability is very impressive.
Cantering
a serpentine is almost the same as the trot. When cantering a serpentine the rider should
halt the horse to change the lead before the change of bend.
Its best to plan out your spacing of
your loops and leave a large space of ring than to discover that halfway down the rail there’s not enough room to finish
your loops.
Adjust your aids according to which direction
the horse is moving from the line up. When going away from the line up the rider
will have to use strong aids and special care so that the horse does not dilly dally or try to go back to the pack each time
he points towards the center of the ring. These more aggressive aids should produce
a strong enough trot so it’s easier for the horse to be guided along the figure.
Use the same guiding aids as you would for circles. On the way back to
the line up make sure to be prepared since many horses speed up down the rail to get back to the pack of other horses and
lineup.
|