|
For Straight Hair Any Length
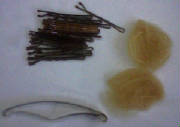
- Hair Brush
- Hair Ties
- Strong Hair Spray or Spray Gel
- 2 Hair Nets (the best hair nets have small net holes: Scunci, CVS brand
Essence of Beauty and Beauty Supply stores)
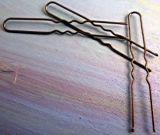
- Hair Pins (Scunci makes good quality thick pins)
- Large Metal Barrette (if needed for long hair)
- Bun Bow
|
| Hair Pins |
- It is best to start with dirty hair; it isn’t as slick and will
hold a style much better than clean hair.
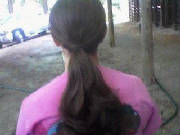
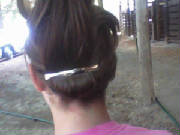
- Brush and smooth out hair really well and put it into a low ponytail.
- If you have long hair flip your ponytail up and use a large barrette
and pin the ponytail up.
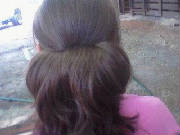
- Brush ponytail back down.
- If your hair is thin, tease it a lot with a brush. If it is fairly
thick, just tease it enough to handle it well, teasing will give the bun volume and make it easier to mold.
- Spray ponytail with hair spray.
- If your hair isn’t really long then you can just start at the
ends and roll your hair up/under until the roll is snug against your head.
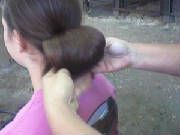
- Take a hair net and figure eight the elastic till it is bun sized.
- Place the hair net on the bun.
- Then begin to pin bun with net to your head with hair pins.
- If you have lots of little hairs on top of your head then take a net
and hold the knot of the net to the hairline on your forehead then pull net down and twist over bun, if there is extra net
but not enough to go around bun roll it up and pin under bun with a hairpin.
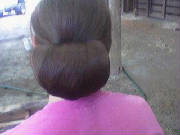
- Place more pins around bun to secure top net.
- Use hair pins to move hair around if needed to cover up hair tie or
space out.
- Hair spray bun well and calm down frizzies.
- If you want to check how secure your bun is jump up and down and add
pins and hair spray if needed.
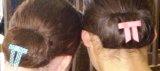
- Add bow to center of bun while looking straight ahead.
- To check bun height put on your hat. Bun should not be so low to touch top
of neck when looking straight ahead.
What you will need
- 1-2 large metal, flat barrettes
- Hair Ties
- Hair net that is your hair color and has small holes, not large ones
- bobby pins
- hair pins
- hairspray
- hairbrush
- straight hair, if it is not straight naturally, then straighten with a flat
iron. It will make the bun sleek.
Procedure
NO TEASING THE HAIR! Teasing the hair makes it fuller and most girls with
curly hair don’t need much help with fullness.
- Brush your hair back into a ponytail at the nape of your neck, as low as
you can and secure with a hair elastic. Make sure it is tight so that it doesn't get loose later.
- Take your ponytail of hair and flip it up and hold against your head.
- Secure the hair against your head with one of the barrettes. Make sure the
barrette is pretty close the elastic. Your hair should now be fanning across your head above the elastic and barrette. If
you have really thick hair, you can spilt it into two pieces and secure with two barrettes.
- Now take the hair net and spread it open. Hold an end in each hand and then
twist your hands in opposite directions. There will now be a twist in the middle of the hair net.
- Fold at the twist and line up the edges of the net. The hair net should look
almost like it started out, but now doubled and it should be half the size.
- Now take the hair above the barrette and fold it down towards your neck.
Hold with one hand at the elastic. Your hair should look almost like a bun. Here is where you start over if the bun will be
too high or too low for the derby or hat you are wearing. Adjust where the elastic and barrette are placed to fix the problem.
- Without letting go of your hair, take the hair net in the other hand and
place it over the "bun" you have created. Start at the top and middle and work your way down both sides at the same time towards
the bottom. Make sure you have all the loose hair in the net and the ends are tucked in. If you have really long hair, you
will have to fold the ends up under the rest of the hair, towards the barrette. The goal is to not have any ends of hair showing.
- This is where practice comes in. You should now have a rough bun that is
semi attached to your head by the barrette and elastic. Start to use hair pins to secure the bun to your head and create the
shape you want. Don't be afraid to push or pull the hair into the shape that you want, be it wider or more oval. I usually
push the bun a little flatter on the head to make sure that it isn't sticking out and flopping. Use hair pins to secure all
the way around. Depending on the hair and how you want the shape, you can use anywhere from 8 hair pins to over 30.
- Once you have pinned the bun into place, make sure their are no flyaways
above your ears or around the bun. Use bobby pins to keep flyaways down.
- Once everything is pinned down, start spraying with hairspray. You want the
sides of your head pretty slick so that you don't have hair sticking out. Even spray the bun, especially if your hair is on
the curly side.
- Clip in the hair bow or sparkly barrette. You want the bow to be straight,
centered and visible when you are looking straight ahead.
Especially for Thick Hair but Good for All Hair Types
Special Thanks to Christy Parker of Pine Haven Stables
- Hair Brush
- 2 hairnets
- 10-20 bobby pins
- Large 4 inch barrette
- Hair Tie
- Hairspray or Spray Gel
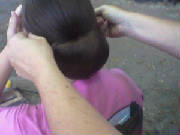
1. Brush hair back, have rider drop chin to chest and put hair in a LOW ponytail
(right below hairline).
2. Take barrette and pretend you are closing it over finger (don't fasten) push/bend the thin half OUTward
using thumb about 1/2 inch(it should still fasten).
3. Flip pony tail upward, against riders head, fasten barrette
right over hair tie (securing ponytail to hair). This makes a basic bun shape...depending on length of hair.
4. Double or triple one hairnet and place over "bun" (tuck any ends of hair in).
5. Push down at top of bun and place bobby pins along barrette, and a few to secure sides.
6. Use
a second hairnet, start in middle of riders forehead (have rider hold) and place of entire head and bun, twist end and double
up over bun.
7. Use pins to finish.
How to Make a Fake Bun
-
Brush
the faux hair straight and smooth.
-
Wrap
the hair around your hand flat.
-
Have your helper double over a hair net and hold open with hand.
-
Place hair in hair net and fluff.
-
Attach
to head with bobby pins and hair pins.
-
Add
a hair net over your head and twist extra over bun.
-
Secure
with more hair pins.
-
Spray
with hair spray to smooth fly aways and for extra security.
Refer
to above procedure for help.
Make a circular bun more oval shaped
Flatten the bun onto the head, so that the hair pushes out farther on
the sides. The more flat you make it, the more hair that pushes out towards the ears. Then using hair pins, grab pieces of
the bun and pull the round sides into more of a square with corners using hair pins to secure.
|